Double-bubble roofs.

Forum for Davrian topics and questions...
User avatar
Hal Mercier
Posts: 182
Joined: Sat Apr 16, 2011 9:02 am
Location: SW France
Contact:

Double-bubble roofs.

Post by Hal Mercier »

Before I got seriously diverted a few years ago, I developed a double-bubble roof panel for Davrians.

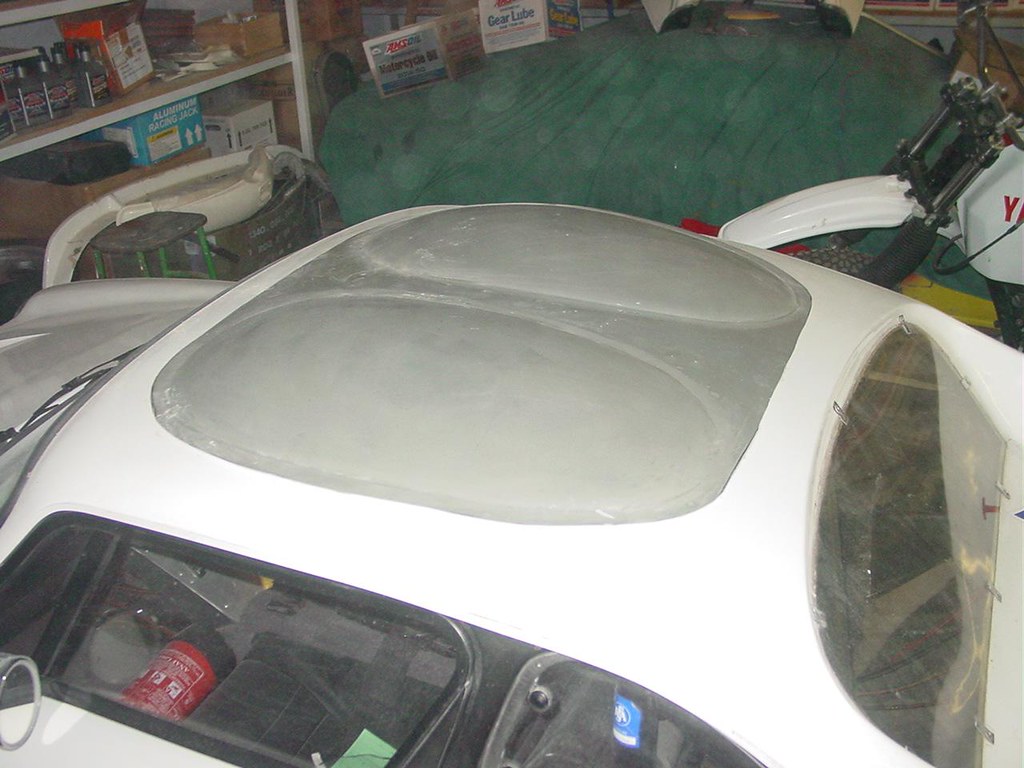
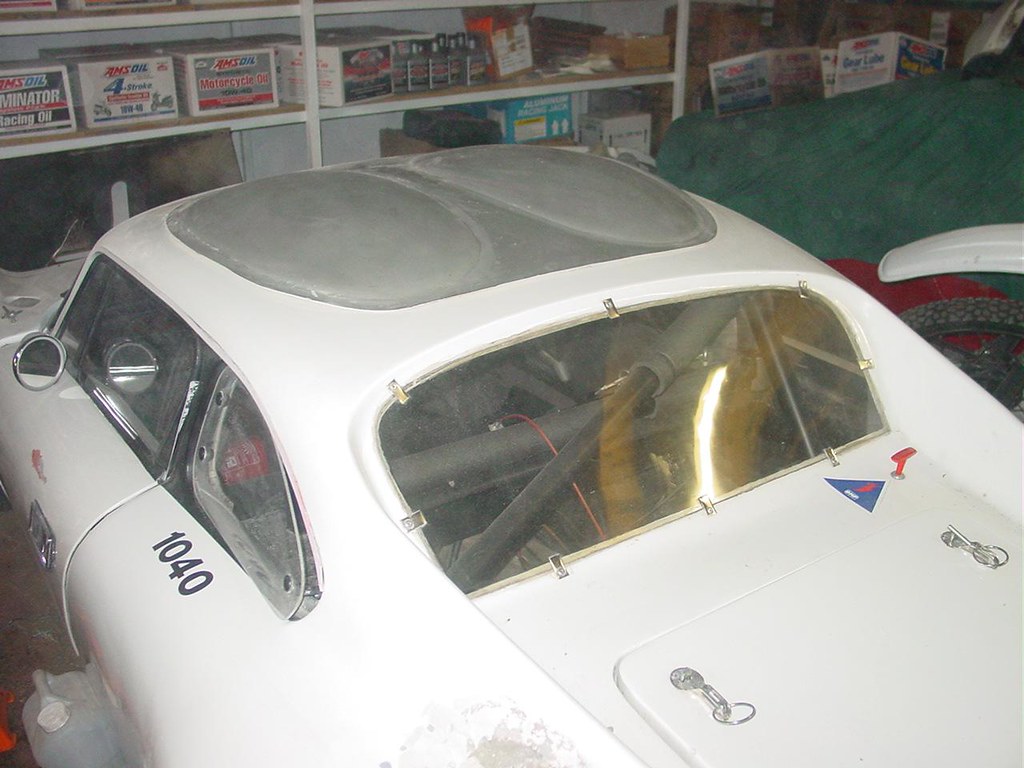
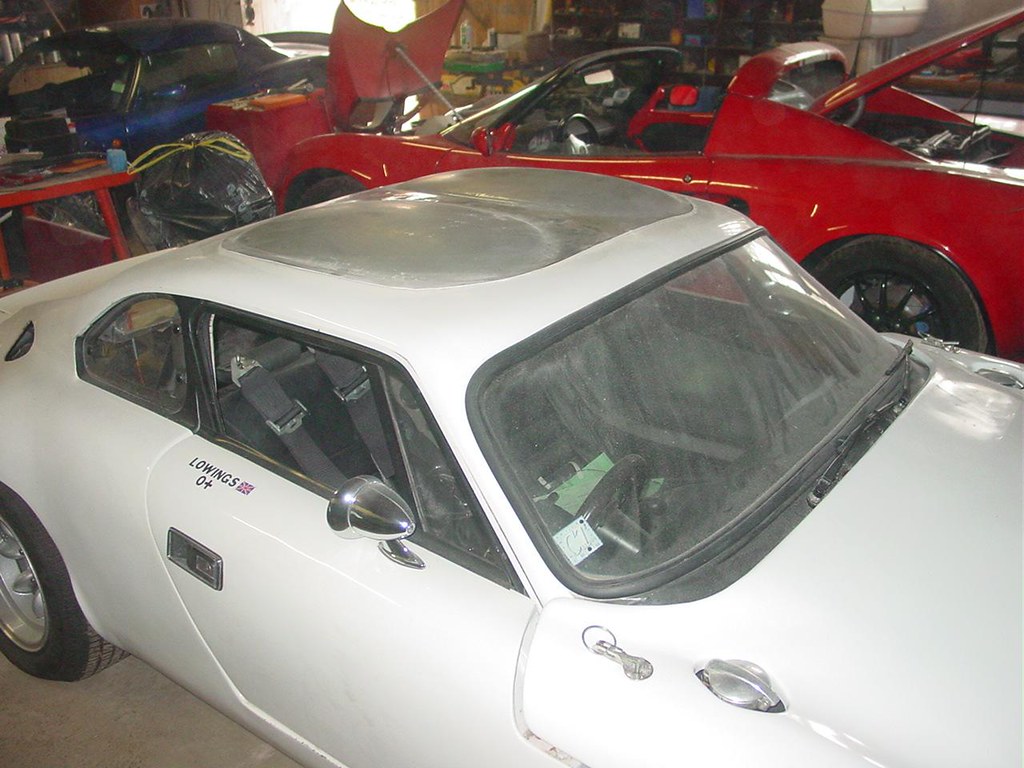
I'd found that with a helmet on, I was bumping the top of the helmet on the inside of the roof, which is uncomfortable and distracting, and does the helmet no good either.

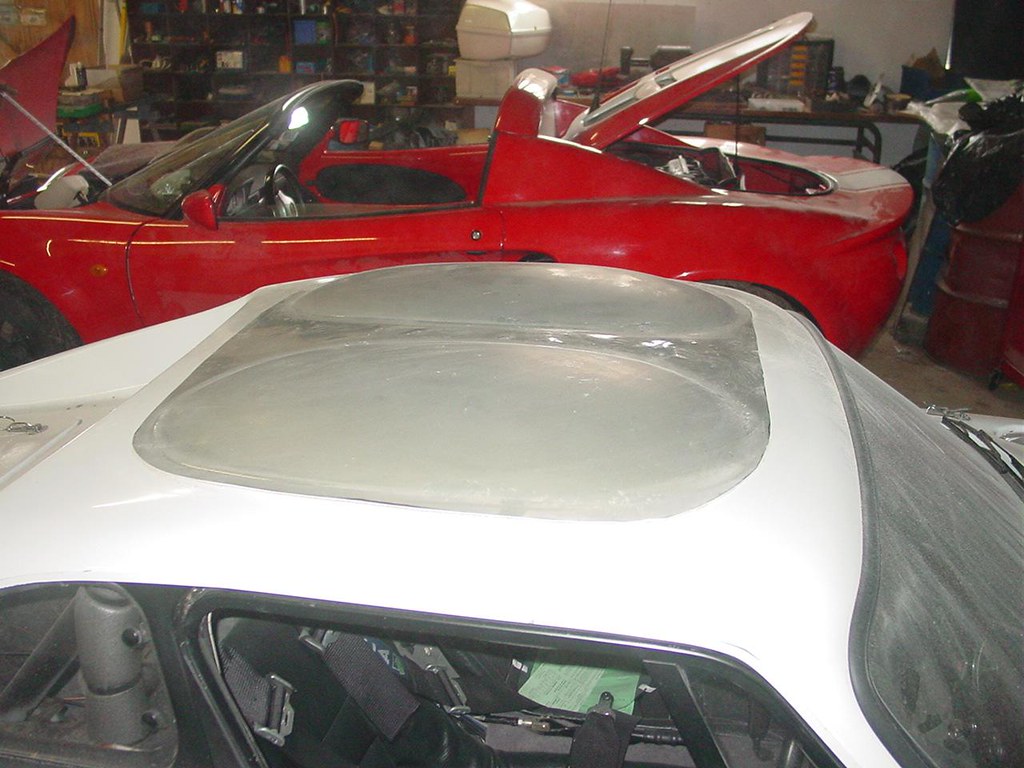
Zagato had used the "double-bubble" design on Abarths way back, and it looks great, so I did a clay mockup and made a mould from it.

I think that's as far as it got! I have the mould actually on the roof of the car now, and it wouldn't take me long to tidy it up, wax it out and pop out the first new panel. I've recently done a lot of rare parts using GRP moulding.....the rear wheelarch lips (spats) for the S1 111S Lotus Elise, the front numberplate plinth for the same cars, exhaust heatshields for Yamaha XT500 and TT500 'C' bikes from 1976 which are unobtainable...

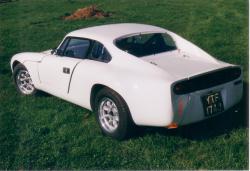
Since finding this site today I'm suddenly inspired to get cracking on my modifications and get my poor Dolores the Mk4 re-painted, with her new shoulder intakes which I also moulded from clay bucks, and back on the road.

It'll mean turfing a good JK box out of course, but I find a road box makes more sense on the road.

The JK can be used on my much lighter Mk7, for some as yet unknown events...I fancy Historic Rallying personally! :mrgreen:

Would anyone be interested in one of these roof panels, which give an extra 3.75cm headroom? If so, I can supply.

They are a slightly teardrop modified ovoid shape.....Zagato would approve.

I'll post pix when Dolores is repainted with the new, steroid-boosted outline of the shoulder intakes and roof bulges under a new, Fetish Orange paint skin as favoured by Mr Adrian Evans Himself.....
gtm4honda
Posts: 85
Joined: Fri Nov 05, 2010 7:45 pm

Re: Double-bubble roofs.

Post by gtm4honda »

Hi i would like to see one of thease roof pods please,trying to get the seats right in my MK8 rally car is a pig.
All the best Dean
Iain
Posts: 43
Joined: Mon Feb 22, 2010 10:23 pm

Re: Double-bubble roofs.

Post by Iain »

Hi Hal,
Good to have you on the site .In one session I think you doubled the traffic!It made returning to the site a really interesting visit.

I'm fascinated by your double bubble roof cos at 6 ft 2 in tall a Dav can be tight. It would be good to see photos when you have some.
I'm currently looking to get another Davrian [ I previously owned and raced a Mk8 and a Mk 7 ,both supposedly road legal ... I also raced the Mk 5 - now being reincarnated by Blade] I'm fairly open as to which Mk I get but want a to be able to use it for competition.You are presumably not thinking of selling the Mk 7 ...?

Is it expensive to retrofit a roll cage in an early car?

Looking forward to seeing more of your cars .

I think when people get their cars finished and on the road ,the south of France will sound like an interesting road trip destination....
Regards
Iain
User avatar
Hal Mercier
Posts: 182
Joined: Sat Apr 16, 2011 9:02 am
Location: SW France
Contact:

Re: Double-bubble roofs.

Post by Hal Mercier »

Hi folks! I've not been online here for a while, as busier than usual. I uncovered the mould for the DB roof after the last post, it needs marginal tidying-up before I can make the first piece, so I'll try and do this in the next few days.

I really want to get the Mk 4 back on the road asap, so this will be an incentive.

It just needs these new GRP parts finishing, and a respray, though I think if it's going to be used on the road, putting a road gearbox and clutch back in it might be wise.

I'll post pix as soon as I have the first one made.
I think when people get their cars finished and on the road ,the south of France will sound like an interesting road trip destination....
Regards
Iain

Iain

Posts: 5
Joined: Mon Feb 22, 2010 11:23 pm
It's a great pity I sold our first place here, it was a 23 acre ex farm, with a lake.....would have been the ideal spot for a Davrian weekend.

Where we are now is a lot smaller but there's still plenty of room for a herd of cars and Davrians aren't over-large!

There are some superb driving roads around here.....
Mark Raymond Lewis
Posts: 9
Joined: Tue May 15, 2012 1:13 pm

Re: Double-bubble roofs.

Post by Mark Raymond Lewis »

Hal

I have just picked up on this posting, have you got any pictures as yet as |would be really interested to see what looks like.

Mark Lewis
User avatar
Hal Mercier
Posts: 182
Joined: Sat Apr 16, 2011 9:02 am
Location: SW France
Contact:

Re: Double-bubble roofs.

Post by Hal Mercier »

Mark,

I have the panel, but not yet fitted it. It's next on the list of things to do, but I've had two restoration projects since I last posted, though they are both about finished now.

I can take a pic of the panel simply sitting on top of the original roof, which would give you an idea of what the thing will look like finished, if you like?

Here's one of the projects I've spent an embarrassing amount of time on....it was a very dangerous machine when I bought it in October 2011......now, it handles fantastically well, but I've had to do a lot of modification, including shortening the forks by about 5" and widening them. Note the 4th wheel, to prevent the lightning roll-over accident which can happen if overcooking a left hander.....now, it should just push the nose back up, rather than the extra braking friction when the nose touches the tarmac, with the rear wheel of the bike a foot in the air, causing a flip-over. Not what you want on a Stelvio descent!

This rig was originally designed to be supercharged, by the way, to bring the torque up. As it is, it's around 80bhp for 360kg. It's a 1976 GL1000 watercooled flat 4 Honda, with period Héchard sidecar. I added heater and cold air ducted to a dashboard with eyeball vents, a rollbar in the boot, car battery in the boot, and a Frantz bypass filter, also in the boot.

It's just waiting for a full leather interior...

Image

Image
User avatar
Hal Mercier
Posts: 182
Joined: Sat Apr 16, 2011 9:02 am
Location: SW France
Contact:

Re: Double-bubble roofs.

Post by Hal Mercier »

I trimmed the first panel today and took some photos. Bear in mind the thing has sprung a bit out of shape as it's been sat supporting a lot of junk for some time (years), so it's no longer the proper shape of the roof at the outer sides, but this doesn't matter as when it's fitted, it'll be held to shape by the alu screw clips and then glassed in, and blended to shape.

This just gives a rough idea of what it'll look like fitted, though I intend to smooth the transition from flat roof to bulge a bit after fitting the panel. I'll get the thing spot-on, then take a production mould off the finished roof on the car.

Image

Image

Image

Image
Mark Raymond Lewis
Posts: 9
Joined: Tue May 15, 2012 1:13 pm

Re: Double-bubble roofs.

Post by Mark Raymond Lewis »

Hal

This looks very interesting. I was rather put off the restoration project when I thought that I would have to raise the roof but this looks interesting. Would you envisage just bonding the final version to a roof or still use the clips you refer to? I would love to see a final version in matching colour.
Lovely outfit by the way. I have a Yamaha Bulldog 1100cc but I had to build the seat up on that to give me enough leg room (I'm a shade over 6' 4")

Mark
User avatar
Hal Mercier
Posts: 182
Joined: Sat Apr 16, 2011 9:02 am
Location: SW France
Contact:

Re: Double-bubble roofs.

Post by Hal Mercier »

The panel is attached very simply.

Centralise it properly and hold in the correct position with 4 bits of gaffa tape. Make 4 arrow point datum marks to line it up with once you've cut the hole out....

Draw around the double-bubble panel, remove it, cut the hole out using a cutting disc on an angle grinder (my preferred method,) or this in combination with an air saw (Tim Duffee prefers this).

Prepare some strips of alu sheet 1/2" by 1 1/2" ish, these will be used to position the new roof in the hole solidly and hold it flush.

Now the new panel should fit exactly inside the hole, so hold it in position, then using plasterboard screws in each end of the ally strips, bridge across the join in at least four places so the panel is held firmly, flush to the original roof.

Adjust as needed so it's lying correctly all round, adding more strips as required to pull the edges up or down as required.

Now, using a grinder, remove the top surface about 3/4" either side of the join line, so that a joining strip of GRP mat can be laid in to bridge the gap. Take the panel thickness down to near zero at the join, tapering up to original thickness on the outer limit of the grind.

This method of making the join from above has the advantage of working with gravity.....I don't know if you've ever tried doing this sort of thing from underneath, but it doesn't work, so unless you have one of those handy "car-spit" things in the workshop,and can spin the car over so it's upside-down, use the method I've suggested. Do tape over the join from underneath, or you'll find resin dripping all over your lovely Alcantara seats...... :o

Once fully bonded, and the strips and screws removed and their gaps bonded the same, sand and finish with filler as normal.

Job's a tapering orange root-vegetable loved by wabbits and RAF night-fighter pilots.....

Despite Tim's comment, I think the finished roof will add character to the car....and so will the shoulder scoops.

Both the roof mods and the scoops are primarily practical, but good practice means that a styling element must also be employed otherwise the end result is usually very 'utilitarian' (read pig ugly) My shoulder scoops will mean I have oil at no more than 90 to 95°C under race conditions, and cold air to the carbs.

I've used a less efficient oil cooling system, ducting air to the cooler from the right side intake vent but not in a tunnel duct, on a 200bhp Elise, and at 155 mph it held 90°C on a hot autobahn, so I know the system works well.

I didn't want an oil rad at the front.
User avatar
Hal Mercier
Posts: 182
Joined: Sat Apr 16, 2011 9:02 am
Location: SW France
Contact:

Re: Double-bubble roofs.

Post by Hal Mercier »

I decided to cut the hole and bond in the panel today.
9.jpg
9.jpg (136.87 KiB) Viewed 8284 times
Held in place with alu strips and screws. Later I put some thin ply rectangles underneath also with two screws each, this allows more GRP strip to be put in more quickly.
13.jpg
13.jpg (130.96 KiB) Viewed 8284 times
Then I ground out the depression for the GRP strips....
14.jpg
14.jpg (83.61 KiB) Viewed 8284 times
and cut the GRP strips ready for the resin mix....
15.jpg
15.jpg (141.33 KiB) Viewed 8284 times
Post Reply